Today I am sharing the next step on my journey to preserving all my family heirlooms in one go. You may want to start at the beginning with Part 1: Home Survey and Part 2: Preparing a Workspace to better understand what I was trying to accomplish with this project. Step 3 might be considered the main event, digging into boxes!
Step 3: Box Inventory
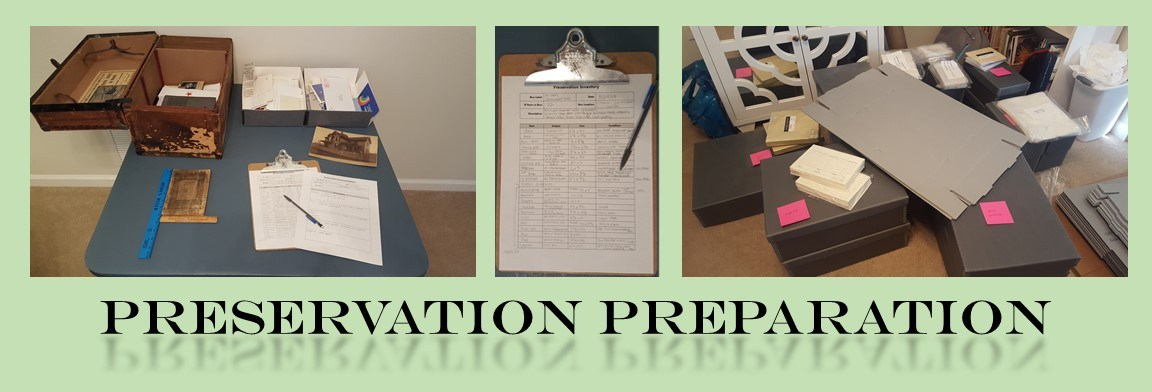
Now is the moment you have been waiting for! You are going to open each box one at a time and remove each item so you can create a detailed list of its contents. This is the time when you are going to think about what special supplies you might need for the preservation of individual items. For this step you will need another form, or many copies of another form. Again, I prefer printed forms on clipboards over typing because I can hold an object in one hand while I jot notes with the other, but do what works for you.
 Each form has a space at the top for some information about the box: label, date of inventory, location box is stored, description of the boxes contents for quick reference. For the remainder of the form there are two versions: one that has the “tally” spaces at the top and one without, according to your preference or needs. The tally spaces are designed to help with determining how many acid free file folders and photo sleeves of each size you will need, without creating a new line item for each photo and group of documents, although you can still choose to do that if you wish.
In the process of my initial inventory, I wasted a lot of time recording each photo and paper separately. When I went on to compile the results I realized that photo sleeves and file folders only come in a few standard sizes. As a result I added the tally boxes to the form, which I hope will save you a lot of time that I wasted. Hey, it’s all a learning process!
The remainder of the form has columns for:
- Item Type (photo, letter, book, etc.)
- Subject/Descriptor (“John Smith,” “Johnson Family”)
- Dimensions (I rounded up to the nearest half-inch)
- Supplies (Product #) & Notes (the supplies you will need to preserve the item, including the part number from the catalog, and notes on its condition or storage plans)
When I did this the first time, I thought I was going to inventory the entire collection then compile it and select supplies to order. In hindsight, it would have been much easier to review the catalog and make a decision in the moment about what I needed to store the item(s) in front of me. So rather than simply writing down that I had a plaster “death mask” that was 6x11x4, I should have stopped and flipped through the catalog to find a box of the appropriate size to hold it and recorded that on the form. It would have saved me a lot of time! The new form reflects this as well.

Starting with a clean work surface, I arranged the tools I gathered in the last step on the table, including the framing square and clip board. My process for working was to remove items from a box one at a time and line them up with my framing square to record the measurements and other details then set them aside in an empty box or on the table, if I had room. When I finished with the entire box I used the list I had just created to return everything to the box in the order it was removed. When the box is complete, check it off on the survey list, return the box to its storage location and clean the table again, if necessary.
Download the two versions of the form here:


