
Although my attempts to begin writing about my ancestors have fallen flat in the last year or two, I have found a new method of sharing that I do enjoy: making videos! It all began last summer when I was taking an online local history course for my library science degree. I was tasked with presenting my results to my long-distance classmates using audio and visuals. I learned how to add audio recordings of narration to my slides and how to save the presentation as a video. (You can see that project here.) I recently decided to try to apply this technique to one of my ancestors after I committed to writing about four of them in my 2018 genealogy goals. You can find the video I made in last week’s post. This week I thought I would walk through a little about how I made the video.
Selecting an Ancestor
In January, I set a list of goals for the year and one of those goals was to write about four specific ancestors. George was one of the ancestors on the list. I selected him as the first one to attempt for this project because I have made contact with many of his descendants through DNA. Most of those descendants have not researched their genealogy and my hope was that this video would help them become acquainted with our common ancestor. Additionally, I had a clear photo of George and I felt like I had a fairly complete overview of his life through documentation. I had each census, some newspaper articles, marriage records and death records, among other things. Although this is not a requirement for any writing or video project, it definitely helps, especially for your first attempt at publishing.
Planning
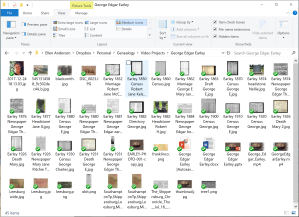 I started by creating a new folder on my computer just for this video project. I made a digital copy of every document and photo I had of George and placed it into this computer folder so I would know what I had to work with. As I went along anything I collected for the video went in this folder. Next, I made a timeline of George’s life in a spreadsheet on my computer. I listed all the facts from my tree then broke them up into slides. Then I matched up facts and slides with documents and images I had collected. I looked for opportunities to add context by placing his life into history and describing the setting.
Gathering
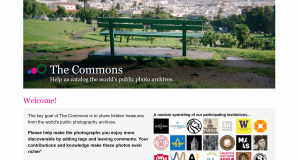 When I had facts, but insufficient documents or images, I filled in the blanks with things I could freely acquire online. I looked for old maps (bonus if you can find maps with dates that match your facts) but I also looked for free photos. Two sources I like to use for copyright-free photos are flickr’s Creative Commons licenses and the Library of Congress website. I especially looked for pictures of the towns and buildings that appeared in George’s story. Although I hadn’t taken a photo of George’s headstone, I did write to a FindAGrave user to ask permission to use her photo. Next, I started dumping images and text on PowerPoint slides while I organized my thoughts and gradually refined each one until the story started to make sense.
Enhancing
Once I started to piece together my slides, I had a better idea of how each slide contributed to the story I was telling. I used special effects features in Microsoft PowerPoint to contribute to the storytelling. If you aren’t familiar with the multitude of animations and effects that PowerPoint offers, I suggest playing around with them and their timing. You have the ability to time effects so they happen simultaneously or one after the other. You can shorten or lengthen the time it takes for the animation to occur, which can change its impact on your presentation. Here are some examples:
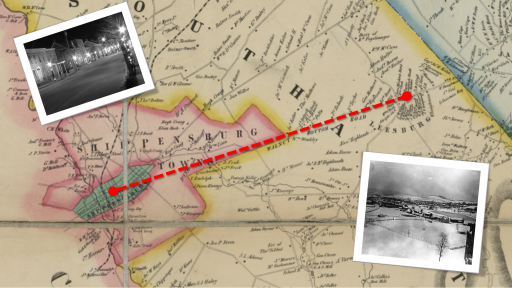 When I wanted to show that George moved, I drew a line then animated it to show the trip. I selected the entrance style “wipe” and which direction I wanted the movement to start. I also went into the drawing style features to add end points to the line for more emphasis.
- I had a screenshot of Google Maps that I set to have only 50% opacity. When I animated it to “fade” in on top of the atlas shot, it very clearly showed how little the area had changed in 200 years.
- Box outlines with various types of emphasis animations can be great for highlighting a single record in a list. Cropping record pages helps the viewer focus on the individual.
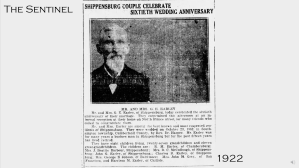
- One little touch I enjoyed making was having the photo appear shortly after the newspaper article appeared on the screen. I did this by making two copies of the image. In the first copy I showed the entire newspaper article. On top of that I placed an opaque box the same color as the article’s background that covered the entire photo. The second copy of the image I cropped down to only show the photo from the article. I had the article and the opaque box covering the photo enter the slide at the same time. Then I added another entrance animation to the cropped photo so that it appeared a few seconds after the rest of the article.
 To achieve the newspaper fade-out when George’s wife passed away, I made a copy of the newspaper photos that I cropped down to only display a small portion of the grainy photo background. I stretched that image so that it took up the entire space that Mary Jane occupied in the photo. I added an entrance animation that would cause that background image to slowly fade into view right on top of Mary Jane so it appeared as though she disappeared right out of the picture.
- I attempted to use the “credits” animation to scroll through the long obituary on the screen. It never quite turned out how I wanted it to and I probably would not attempt this again.
Finishing
I spent a loooong time playing around with the timing of all the animations so that they would appear exactly the way I wanted them to. It was worth it. Later I added transitions between the slides. I tried to select transitions carefully so that they would enhance what I had already done with the slides but not distract from the story. I wrote out a script for each slide in the “notes” feature and rehearsed the timing of the narration many times.
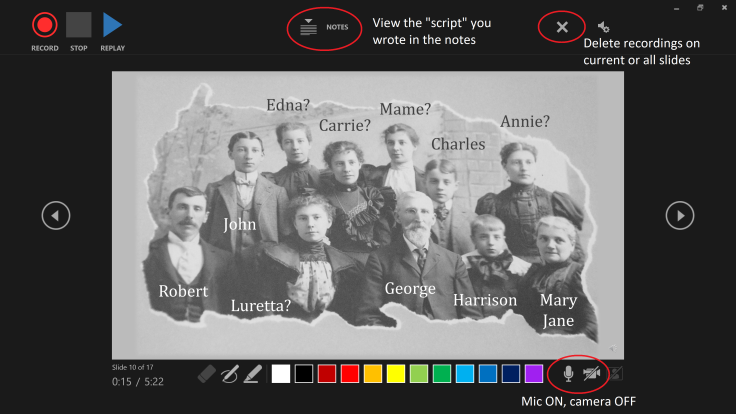
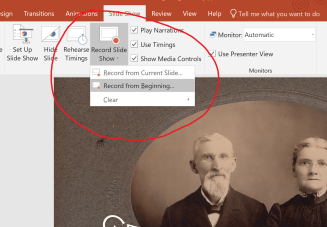 When I was completely finished, I recorded the slides. To do this I selected the “Slideshow” tab and then “Record Slideshow.” This opened up a recording studio view where I could read the notes I had typed for each slide as my script. As I clicked through the animations, the timing of my clicks was captured by the recording along with my voice. If you don’t want to appear in your video, be sure to turn off the camera before you start recording. Speak slowly and evenly in your recording. Turn off anything noisy, like the heater or your phone notifications. Don’t be afraid to delete the recording on a slide and do it over again until it turns out the way you want it to.
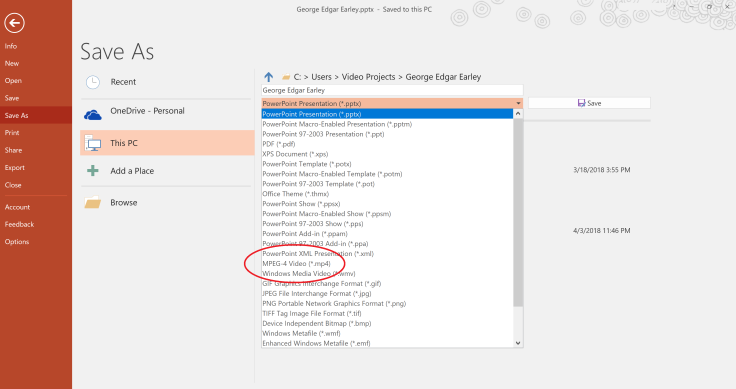
When I finished recording and I was happy with the results, I went to “Save As” and looked for a file format drop-down menu. The default is “.pptx” because you are in PowerPoint, but you can change it to other formats. Select “.mp4” video to save the recorded audio and animations as a video format. It will take a while so be patient. You can also select an image format (.jpeg, .png, .tif) to save one or all slides as individual images. This is useful for making a video thumbnail for YouTube. Finally, I uploaded the video to YouTube so I could share it with others!
Why not try making your own ancestor video? If you do, please share your results with me so I can see it!

Thank you for your clear and detailed instructions, the video is excellent.